
Bright Ideas:
Upgrading to LED Lighting and Smart Fixtures
in Your Home
Thinking about brightening up your home with new lighting? Upgrading to LED bulbs and smart lighting fixtures is one of the smartest home improvements you can make. Not only will you enjoy better illumination and modern conveniences, but you’ll also save energy and money in the long run. This guide will walk you through the benefits of LED lighting upgrades, explain key concepts like lumens and color temperature, and highlight smart lighting options that can transform your living space. We’ll also give practical tips, room by room, and help you decide which projects you can tackle yourself and when to call in a licensed electrician. Let’s shed some light on the subject!
Upgrading your home’s lighting shouldn’t be overwhelming. By the end of this article, you’ll know how to choose the right LED bulbs and smart fixtures for each area, what to expect in terms of energy savings, and how to avoid common pitfalls (like flickering lights or compatibility issues). Let’s dive into these “bright ideas” and illuminate your home in the best way possible.
Why Switch to LED? (LED vs. Incandescent vs. CFL)
If you’re still using old incandescent or CFL bulbs, you might be wondering what makes LEDs so special, in a word: efficiency. LED (Light-Emitting Diode) bulbs produce light far more efficiently than traditional bulbs. In fact, ENERGY STAR confirms that LEDs use at least 75% less energy and last 25 times longer than incandescent lighting. That means big savings on your electric bill and fewer trips up the ladder to change burnt-out bulbs. LEDs also waste very little energy as heat, unlike old incandescents, which get hot to the touch (and pose burn or fire risks).
By contrast, incandescent bulbs convert most of their energy into heat, not light. They typically last only around 1,000 hours (about a year of average use). That’s why many common incandescent bulbs were phased out by energy regulations. Halogen incandescent bulbs are a slightly more efficient update, but they still run hot and burn out within a year or two. CFL (compact fluorescent lamp) bulbs improved efficiency over incandescents and often last around 8,000-10,000 hours (several years), but contain a small amount of mercury, which is hazardous if the bulb breaks. CFLs also require special disposal due to their mercury content. LEDs have neither of those downsides.
To make the differences clear, here’s a quick comparison of incandescent, CFL, and LED bulb performance:
| Feature | Incandescent (old-style) | CFL (fluorescent) | LED (modern) |
| Energy Use | ~60W for ~800 lumens (very inefficient) | ~13-15W for ~800 lumens (better) | ~8-10W for ~800 lumens (highly efficient) |
| Lifespan | ~1,000 hours (about 1 year of use) | ~8,000-10,000 hours (6-8 years) | 25,000-50,000 hours (15+ years) |
| Heat Output | Very high – gets hot to touch | Moderate – less heat than incandescent | Very low – stays cool (wastes little energy as heat) |
| Color Temperature | Warm (2700K); no cool options | Mostly warm/soft white options | Available in warm (2700K) to daylight (5000K+) |
| Contains Mercury? | No | Yes – small amount (requires special disposal) | No |
| Dimmable? | Yes (all are naturally dimmable | Some models (may flicker or need a special dimmer) | Yes (look for “dimmable” rating on bulb) |
| Upfront Cost | ~$1 per bulb (very cheap) | ~$2-$5 per bulb (moderate) | ~$3-$10 per bulb (higher, but dropping) |
| Long-Term Cost | Highest energy cost; bulb burns out fast | Lower energy use, but contains mercury | Lowest energy cost; saves ~$80 in electricity per bulb over its life |
Table: Typical comparison for a 60W-equivalent bulb. LED bulbs cost more upfront but pay you back through energy savings and longevity.
As you can see, LEDs come out on top in virtually every category. They produce the same brightness (measured in lumens) for a fraction of the energy. In practical terms, swapping a 60W incandescent for a 9W LED can give the same light output while using ~85% less power. And because LEDs last for years or even decades, you’ll buy and climb ladders to change bulbs far less often. Over the lifetime of one LED bulb, you might have gone through 20 or more incandescent bulbs!
LEDs also run cooler. Ever unscrewed a hot light bulb and burned your fingers? That’s almost a non-issue with LEDs, which remain cool to the touch. This makes them safer in enclosed fixtures and reduces the risk of fire or heat damage around lampshades.
Finally, LEDs are instant on (no warm-up time like some CFLs) and many are fully dimmable – just make sure to use an LED-compatible dimmer switch to avoid flicker (more on that later). There are even smart LED bulbs you can control with your phone or voice. In short, upgrading to LED lighting is a bright idea for both your wallet and your home’s comfort.
Lumens vs. Watts: Understanding Brightness and Energy
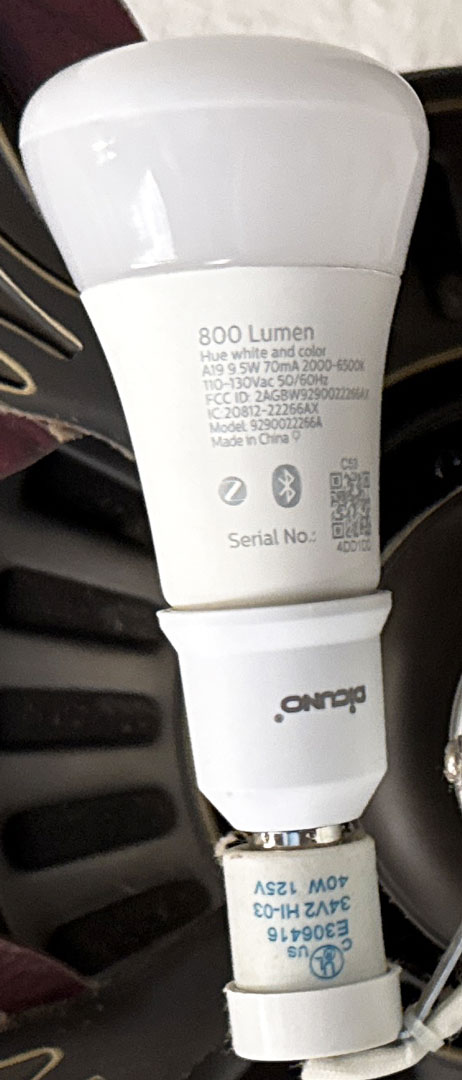
One big change with modern lighting is how we talk about brightness. With old bulbs, people chose a bulb by wattage (“a 60-watt bulb”). But wattage is actually a measure of energy use, not light output. Brightness is measured in lumens, not watts. A 60W incandescent produces around 800 lumens of light. An LED that produces 800 lumens might only use 8 or 9 watts. So, when shopping for new bulbs, look at lumens to gauge how bright the bulb is, and look at watts to see how much electricity it uses.
Manufacturers often list “watt-equivalent” on LED bulb packages (e.g. “800 lumens – replaces 60W”). This helps consumers match the new bulb to the old light output. The key takeaway: lumens tell you how bright a bulb is; watts tell you how much energy it consumes. For maximum efficiency, choose the bulb with the lumens you need at the lowest wattage. For example, if two LED bulbs both give ~800 lumens, but one uses 9W and another uses 11W, the 9W is more efficient.
Also, pay attention to the bulb’s lighting facts label (similar to a nutrition label for bulbs). It will list lumens, estimated yearly energy cost, color temperature, and whether the bulb is dimmable or needs special conditions (like “enclosed fixture rated”). This label helps you pick the right bulb for the right location.
Choosing the Right Color: Kelvin and Color Temperature
Beyond brightness, the “color” of the light is crucial to getting the look and feel you want in each room. Light color is described by color temperature, measured in degrees Kelvin (K). This ranges from warm yellowish light at lower Kelvin values to cool bluish light at higher Kelvin values. Unlike old bulbs, which were primarily warm (soft yellow light), LEDs come in a wide range of color temperatures.
To help you select the best light color for each space, use this quick reference chart:
Color Temperature Quick Guide (Kelvin) – Common Rooms & Recommended Ranges
| Room/Area | Recommended Color Temp (Kelvin) | Description & Use Case |
| Living Rooms & Bedrooms | 2700K – 3000K (Warm White) | Cozy, soft glow – ideal for relaxation and comfort. Mimics traditional incandescent glow for a welcoming atmosphere in lounges, dens, and sleeping areas |
| Dining Room | 2700K – 3000K (Warm White) | Warm and inviting – flattering light for meals and entertaining. It can go up to ~3000K for a bit more “modern” brightness while still remaining warm. |
| Kitchen | 3000K – 4000K (Neutral White) | Neutral to cool white – brighter task lighting for cooking and food prep. Provides clarity for chopping and reading recipes while still being comfortable in an open-concept space. |
| Bathroom | 3000K – 4000K (Neutral White) | Bright, crisp light – ideal for grooming and makeup. Closer to daylight helps see true colors in the mirror. You can use the higher end (3500K-4000K) at the vanity, sometimes even up to ~5000K for daylight simulation if desired. |
| Home Office / Garage | 4000K – 5000K (Cool White/Daylight) | Cool, energizing light – great for detail-oriented tasks. In a workshop, office, or garage, a 4000K+ bulb helps with focus and seeing fine details. |
| Outdoor & Security | Varies: 2700K for ambience; 5000K+ for security | Warm 2700K for porch lights and landscape lighting to give a cozy glow. For motion floodlights or security lamps, many prefer 5000K “daylight” for maximum visibility. (Ensure outdoor fixtures are rated for exterior use and damp/wet locations.) |
Table: Color temperature guidelines for different home areas. Lower Kelvin = warmer/yellow light. Higher Kelvin = cooler/white-blue light.
As shown above, warm white (~2700K) is generally best for spaces where you relax – living rooms, bedrooms, dining rooms – because it creates that cozy, intimate feel similar to old incandescent lamps. Neutral white (3000K-3500K) strikes a balance and works well in active spaces like kitchens and bathrooms, giving a clean, bright look without being too harsh. Cool white/daylight (4000K-5000K+) is great for work areas or where you need crisp, accurate light – such as a garage workshop, home office, or reading lamp – because it mimics daylight and can help with alertness and seeing contrast.
- Pro Tip: Keep color temperature consistent within a room whenever possible. If you mix a 2700K lamp with a 5000K lamp in the same space, the difference will be noticeable and might feel “off.” Staying within one range per room (or adjacent open spaces) gives a more uniform, designer look. Many homeowners find ~3000K is a happy medium that works throughout most of the house – soft enough for comfort, but still bright and white enough for tasks.
Also consider CRI (Color Rendering Index) when buying bulbs. CRI is a measure of how accurately the light shows colors (on a scale of 0-100). Natural sunlight and incandescents have a CRI near 100. Most LED bulbs have a CRI in the 80s, which is decent. High-CRI LEDs (90+) are available and will make colors in your home (furniture, paint, skin tones) appear more vivid and true-to-life. For areas where color accuracy matters (like a closet where you pick clothes, or a kitchen with vibrant décor), look for bulbs labeled CRI 90+ or “High CRI.” They may cost a bit more, but the improvement in color quality is noticeable – that new teal backsplash or the artwork on your wall will “pop” with high-CRI lighting.
Room-by-Room Lighting Upgrade Plan
Every room in your house has different lighting needs. Here’s a handy room-by-room guide to upgrading to LED and adding smart features where they make sense:
Kitchen Lighting Upgrades
Current situation: Kitchens often have outdated fluorescent tubes or a single ceiling fixture that leaves counters in shadow.
Bright idea: Layer your kitchen lighting for functionality and ambiance. For general lighting, retrofit any recessed ceiling cans with LED downlight kits or replace old fluorescent fixtures with new LED flush mounts. Under-cabinet LED strip lights or puck lights are a game-changer; they illuminate your countertops for chopping and cooking, making the whole space more usable. Many under-cabinet LEDs are available in plug-and-play kits or can be hardwired by an electrician for a cleaner look. Choose a neutral white around 3000K-3500K under cabinets for true color rendering of your food (no more guessing if that steak is rare or medium!).
Smart add-ons: Consider installing occupancy sensors or smart motion sensors in pantry closets. The light will automatically turn on when you open the pantry door or walk in, then shut off after you leave. This is convenient when your hands are full of groceries. You can also use smart bulbs in your kitchen pendants or overhead fixtures to adjust brightness or color temperature. For example, set brighter, cooler light when cooking, then dim warmer light for late-night snacking. If you have a breakfast nook, a smart dimmer on the light can let you create a cozy mood for early mornings.
Safety tip: Kitchens are one place where proper installation is key. If adding new hardwired fixtures (like recessed lights or under-cabinet lights that tie into your electrical system), it’s wise to have a licensed electrician do the install. They’ll ensure all connections are in junction boxes and up to code (especially important in kitchens where circuits may be GFCI protected). And don’t forget to use damp-rated LEDs for fixtures near the sink to handle humidity.

Living Room & Dining Room Lighting Upgrades
Current situation: Your living room might still have those basic “boob light” dome fixtures or a dated chandelier in the dining room with inefficient bulbs. These rooms benefit greatly from an upgrade in both style and tech.
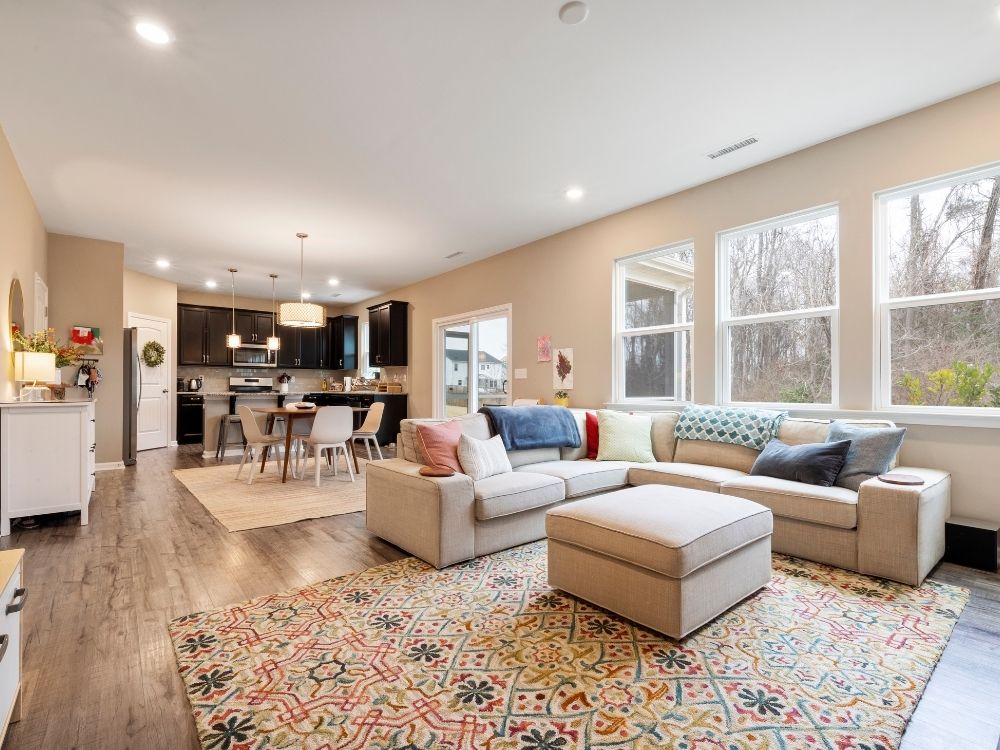
Bright idea: In living rooms, think layered lighting. This means combining overhead lighting with accent and task lights. For example, you could replace a central ceiling fixture with a stylish LED-compatible chandelier or a fan-light combo, then add LED floor lamps or table lamps in corners for reading. Swap out any remaining incandescent or halogen bulbs in lamps for LED equivalents (if you love the warm glow of old bulbs, look for “LED filament” bulbs, which mimic the vintage look but are efficient). In the dining room, an upgraded fixture over the table can be a stunning focal point. Go for an LED chandelier or pendant that’s dimmable, so you can dine under bright light for homework or crafting, or dim, cozy light for dinner parties.
Smart add-ons: Smart switches work great in communal areas like living and dining rooms. Instead of fumbling for multiple lamp switches, you can control an entire room’s lighting with one voice command or app tap. For example, install a smart wall switch for the overhead lights so you can ask Alexa/Google to turn on the “Living Room Lights” and have both the ceiling fixture and plug-in lamps (via smart plugs or smart bulbs) come on together. You can also create scenes – one tap could set all the living room lights to 30% brightness and warm white for movie night, or 100% and cool white for cleaning day. In the dining room, a smart dimmer switch on the chandelier lets you easily adjust brightness for ambiance. Pro tip: if you have a 3-way switch setup (two switches controlling the same light), make sure to get a compatible smart 3-way dimmer or hire an electrician to handle the 3-way wiring with smart controls, as these can be tricky.
Don’t forget accent lighting: use LED strip lights to add a subtle glow behind your TV (bias lighting) or in coves/shelves. Many of these come with smart color-changing capabilities, so you can “paint” the wall in any hue you like for holidays or immersive movie vibes.
Bedroom Lighting Upgrades
Current situation: Bedrooms often have only a single overhead light (if any) and maybe a couple of lamps.
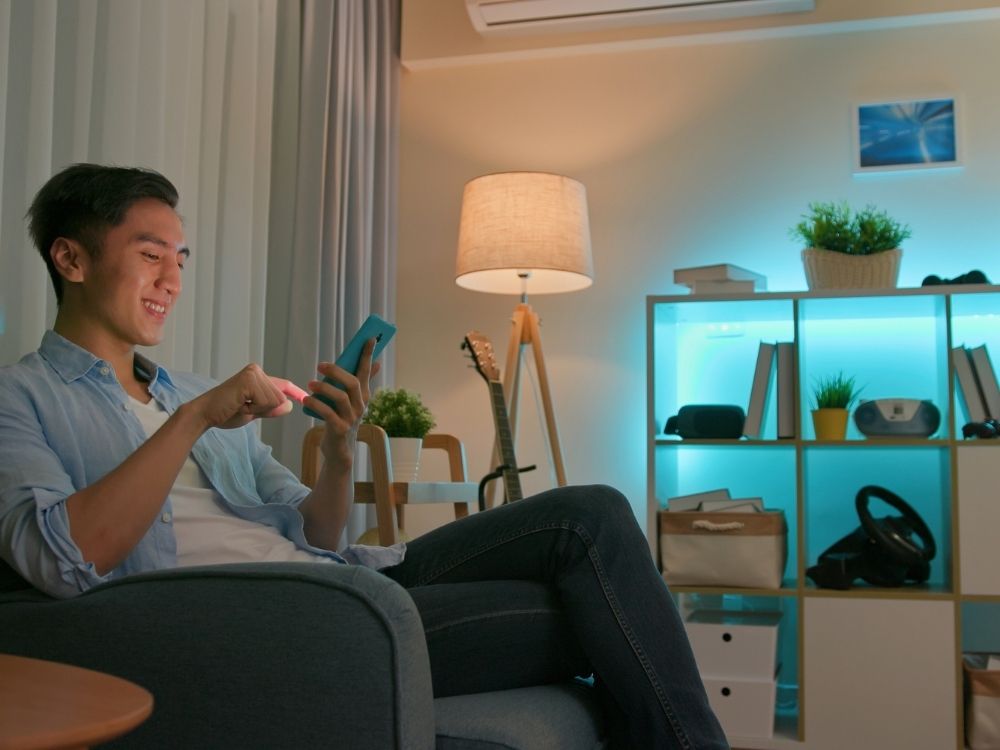
Bright idea: The goal in bedrooms is to create a calm, cozy atmosphere while still providing enough light when you need it (like getting dressed). Start by choosing warm LED bulbs (around 2700K) for bedside lamps and overhead fixtures – this helps signal your brain to wind down in the evenings (harsh blue light can interfere with sleep). If you have ceiling fan lights, swap in LED bulbs that are labeled dimmable so you can install a dimmer switch (or smart fan control) to dial the brightness down at night. Consider adding LED strip lighting along the toe-kick of your bed frame or under bedroom furniture as a night-light; some products have motion sensors so a soft glow comes on if you get up at night, preventing stubbed toes without blasting your eyes with bright light.
Smart add-ons: Bedrooms are perfect for smart bulbs, especially color-changing ones. Why? You can program gentle wake-up routines, where the smart bulbs gradually fade on in the morning with a warm sunrise-like glow (much nicer than an alarm clock blaring). At night, you could have them gradually dim or shift to a very warm amber to cue your body for sleep. Many people also enjoy voice-controlling bedroom lights (“Alexa, turn off the bedroom lights” when you’re already comfy in bed). If you have kids, smart lighting can be fun and functional – imagine telling the lights to turn a soft red at bedtime as a signal it’s time to sleep, or using a motion-activated night light for a toddler that fears the dark. Just be sure that any smart bulb in a child’s room defaults to a warm color at night.
Extra tip: For nurseries or guest rooms, consider smart plugs for lamps – you can create schedules (like a lamp coming on at dusk for a lived-in look, or a gentle lamp turning on in early morning in a nursery for feeding time). These small touches add convenience and can even enhance security (timing lights to make it seem like someone’s home).
Bathroom Lighting Upgrades
Current situation: Many bathrooms suffer from either dim, yellow lighting or overly harsh light. Often, there’s just a single vanity bar or ceiling fixture.
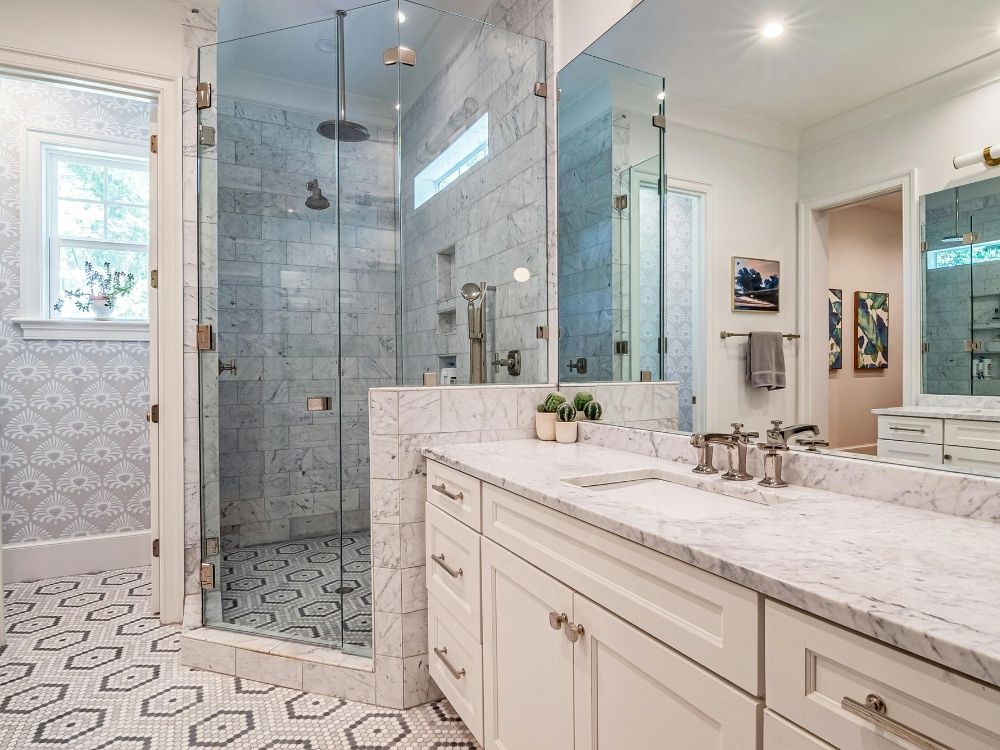
Bright idea: Aim for bright, even lighting around the mirror and a softer option for general illumination. A great upgrade is installing an LED vanity light or Hollywood-style mirror lights that spread light evenly across your face – ideal for makeup application or shaving. Choose a neutral white in the 3000K-3500K range for vanity lights to mimic natural daylight and show true skin tones (some high-end vanity LEDs even let you switch color temp for different times of day). For general bathroom lighting, recessed LED downlights work well to fill the room with light. Also, consider an LED night-light feature: some new bath exhaust fans or toilet bowl lights have built-in LED night lights, or you can simply plug an LED night-light into an outlet. Upgrading old bulbs in shower lights to LED is a must too – just make sure they are rated wet-location if inside a shower enclosure.
Smart add-ons: The bathroom is a prime spot for an occupancy/vacancy sensor switch. You’ve probably experienced someone leaving the bathroom light or exhaust fan on for hours – a sensor switch can automatically turn it off after, say, 5 minutes of no motion. You can set it as occupancy (turns on and off automatically) or vacancy (you manually turn on, but it will auto-off). Vacancy mode can be nice for bathrooms to avoid unwanted offs when you’re very still in the tub! Many sensor switches are straightforward for an electrician to install in place of a standard switch. If you have a half-bath or powder room used by guests, they’ll never have to fumble for a light switch with a motion sensor in place.
Another smart option: smart bulbs or strips behind a bathroom mirror or under the vanity for mood lighting – you could have a relaxing dim blue or purple light during a soak in the tub (just keep any smart controls away from direct water exposure).
Garage & Exterior Lighting Upgrades
Current situation: Garages often have old screw-in bulbs or shop lights, and exterior lights might be outdated fixtures with high-wattage bulbs (or none at all in important spots).
Bright idea (Garage): Swap garage and workshop lights to bright LED shop-light fixtures or high-output LED bulbs. For instance, if your garage has a couple of bare bulb sockets, you can screw in new LED garage “trifold” bulbs that cast light in all directions, vastly improving brightness. Or install flush-mount LED fixtures on the ceiling – many are linkable and easy for an electrician to wire in series. Choose a daylight color (~5000K) for garages and workbenches for maximum visibility. Under-cabinet strip lights can also go under shelves in a workshop area. Another simple upgrade: replace the old trouble light or clamp light with an LED work light (they run cool and can be battery-backed for use during power outages). And don’t forget to illuminate the garage exterior – an LED over the garage door and motion lights on the driveway sides enhance security and safety (no more tripping on toys in the driveway in the dark).
Bright idea (Exterior): For outdoor upgrades, focus on two goals: curb appeal and security. Replace any outdated porch lights or wall lanterns with modern LED fixtures – there are stylish coach lights and flush mounts that have built-in LED modules (so you never have to change a bulb outside). Many even have dusk-to-dawn sensors so they automatically come on at nightfall. Use warm 2700K or 3000K LED bulbs in decorative outdoor fixtures for a welcoming glow. For paths and landscapes, low-voltage LED landscape lighting kits make it relatively easy to add pathway lights, uplights for trees, or lights around a patio. These use a transformer and are much more efficient and long-lasting than old halogen landscape lights.
For security, install motion-activated LED floodlights at key points (driveway, back yard, side yard). LEDs excel here because they reach full brightness instantly when triggered (unlike some older floods that took time to warm up). Modern motion lights often have adjustable settings for sensitivity and duration, and some even have smartphone connectivity to alert you when motion is detected. If you live in the Midlands of South Carolina, you know thunderstorms and power blips are common – consider an LED security light with battery backup or have a whole-house generator/backup power for crucial lights like those on stairways.
Smart add-ons: Exterior lighting can be smart, too. You can use smart bulbs in enclosed porch fixtures or smart plugs for holiday lights and string lights. Smart floodlight cameras (like Ring, etc.) combine motion LED lights with cameras you can view on your phone – a popular upgrade for home security. Also, tying exterior lights into your smart home means you can set schedules (e.g. landscape lights turn on at sunset and off at midnight) or use voice commands (“Alexa, turn off the porch light”). Just ensure any smart device outdoors is rated for exterior use or protected from the weather. And for South Carolina’s frequent storms and power surges, consider having an electrician install surge protection for your electrical panel if you don’t already have it. The 2020 National Electrical Code actually requires surge protective devices in new or renovated homes because power surges (often from lightning) can easily damage LED drivers and smart electronics. A relatively inexpensive surge protector at the panel or for specific circuits can save your new high-tech lighting from an untimely end.
Smart Lighting 101: Bulbs, Switches & Beyond
Upgrading to LEDs is a great first step. But what makes a lighting upgrade really “smart”? This section covers the basics of smart lighting options and how to avoid common pitfalls when modernizing your home with smart tech.
Smart Bulbs vs. Smart Switches (Which Should You Choose?)
There are two main paths to smart lighting control: you can use smart bulbs or install smart switches (or a combination of both).
- Smart Bulbs are LED bulbs with built-in wireless connectivity (Wi-Fi, Zigbee, or Bluetooth). You screw them into your existing lamps or fixtures just like any bulb. Once connected to an app or smart home system, you can control them individually or in groups – change brightness, color, schedule timers, etc. The big advantage of smart bulbs is ease of installation: it’s literally a bulb swap, no tools required. You can have colored lights or tunable white lights that go from warm to cool, giving you a lot of flexibility in one bulb. They’re perfect for lamps or fixtures that aren’t tied to wall switches (like plug-in lamps). The downside is if someone flips off the power switch that feeds the smart bulb (e.g. turning off the lamp or wall switch), the bulb loses power and can’t be controlled until switched on again. Also, outfitting an entire home with many smart bulbs can get pricey, and controlling dozens of individual bulbs can become complex (though you can group them in apps).
- Smart Switches replace your traditional wall light switches or dimmers. They connect to your Wi-Fi or smart hub and allow you to control the circuit’s lights (even regular “dumb” LED bulbs) remotely. The advantage: one smart switch can make an entire group of ceiling lights or recessed lights “smart”, without having to change each bulb. They are also often more cost-effective when you have many lights on one switch, since you buy and install one switch rather than multiple bulbs. And family members can still use the wall switch normally; it just gains smart capabilities. The challenge is installation – it involves turning off your breaker, pulling out the old switch, and connecting the new smart switch’s wires. If you’re comfortable with basic wiring, it’s doable. Still, many homeowners opt for an electrician to install smart switches, especially if their switch box lacks a neutral wire (common in older homes), which many smart switches require. Additionally, 3-way circuits (where two switches control one light, like at the top and bottom of stairs) require compatible smart 3-way switch kits and can be a bit confusing to wire. Smart switches also typically need a steady Wi-Fi connection (or Zigbee/Z-wave hub) within range to function reliably.
So which is best for you? It depends on the situation:
- If you love color-changing lights or want to tweak each lamp’s color temperature, smart bulbs are the way to go.
- If you have lots of built-in lights on one circuit (e.g. 6 recessed lights in the living room), a smart switch might be simpler and cheaper than 6 smart bulbs.
- In some cases, you can also mix and match: use smart switches for your main overhead lighting, and supplement with a few smart bulbs in select lamps for color ambiance or special occasions. All can be integrated in platforms like Alexa or Google Home for voice control together.
Importantly, if you choose smart bulbs, consider disabling or bypassing any old dimmer switches on that line (replace with a standard on/off switch or keep them at full). Old dimmers will reduce voltage to the bulb, which can confuse or damage smart LEDs. Use the app to dim instead, or install a smart dimmer designed to work with smart bulbs.

Common Pitfalls and How to Avoid Them
Upgrading to LED and smart lighting isn’t difficult, but here are some common issues homeowners encounter – and how to solve them:
Flickering or Buzzing LED Lights:
So you put in a new LED or smart bulb and now it flickers, especially when dimmed. What gives? The most likely culprit is an incompatible dimmer switch. Many older wall dimmers were made for incandescent bulbs and don’t play well with LEDs’ electronics. The result can be flickering, buzzing, or a limited dimming range. The fix: swap to an LED-compatible dimmer (look for “LED dimmer” or “CL dimmer” which stands for CFL/LED). If the light still flickers at very low dim settings, you might need to set a higher minimum dim level – some advanced dimmers have a trim adjustment for this. Always ensure your LED bulbs are marked dimmable; non-dimmable LEDs will definitely flicker or buzz when used with a dimmer. Another source of flicker can be loose connections (make sure bulbs are screwed in tight and no wiring is loose) or voltage fluctuations in your home. Major appliances kicking on (AC, fridge) can cause momentary dips – LEDs are more sensitive to those. If you notice whole-house flicker when appliances start, consider having an electrician check your panel neutrals and maybe install a voltage surge suppressor.
“Smart” Lights Not Responding:
If your smart bulbs or switches occasionally don’t respond to app/voice commands, it could be a connectivity issue. Wi-Fi based devices need a good signal – if your router is on one end of the house and the smart device on the other, consider a Wi-Fi extender or mesh network to improve coverage. Zigbee or Z-wave smart bulbs (like Philips Hue) rely on their hub; ensure the hub is centrally located. Also, too many 2.4 GHz Wi-Fi devices can crowd the network – upgrading to a dual-band router or a dedicated smart home hub can help if you have dozens of gadgets. Lastly, check if the device lost power – for smart bulbs, as mentioned, a turned-off lamp or switch will make them offline. For smart switches, a tripped breaker would do it (rare, but check if the circuit breaker flipped). A quick power cycle usually reconnects a stubborn device.
Compatibility of Smart Systems:
Not all smart devices talk to each other. Try to stick to one ecosystem or check compatibility (e.g., Will that smart switch work with my Alexa or Apple HomeKit?). Many Wi-Fi devices have their own apps, but can also be linked to voice assistants. If you’re unsure, ask your electrician or a tech-savvy friend for recommendations. Common platforms like Amazon Alexa, Google Home, and Apple HomeKit support a wide range of products. It’s a good idea to buy reputable brands for reliability and security (cheap, no-name IoT (Internet of Things) devices might pose security risks or stop working suddenly).
Three-Way Switch Confusion:
We touched on this, but it’s worth noting: if you have two switches controlling one light, you need a smart switch solution that supports 3-way. This often means replacing both switches (one smart master and one aux switch). If you replace just one side with a standard single-pole smart switch, the circuit won’t work properly. In these cases, professional installation can save a lot of head-scratching. The same goes for 4-way circuits (three switches for one light) – those are even trickier.
Neutral Wire Requirement:
Many smart switches (especially Wi-Fi ones) need a neutral wire in the box to complete the circuit (that’s how they stay powered to communicate, even when the light is off). Homes built before roughly the mid-1980s often lack a neutral in the switch box – the neutral was kept up in the light fixture instead. If you open your switch box and only see two wires (hot in and switched out), you have no neutral. The options are: choose a smart switch that doesn’t require neutral (there are a few designed for this situation, usually dimmer types that “leak” a tiny current), or have an electrician re-wire to bring a neutral into the box, or opt for smart bulbs instead of a smart switch on that circuit. This is a common hiccup in older homes, so don’t be surprised if you need some electrical work to accommodate the new tech.
Beam Spread and Brightness:
When replacing fixtures, consider the beam angle of LED bulbs or fixtures. Unlike old bulbs that threw light in all directions (360°), many LED fixtures are directional. For example, an LED recessed downlight might have a 60° beam angle – fantastic for focused task lighting directly below, but not illuminating the whole room if ceilings are high. For broad illumination, look for wider beam angles (some LEDs are 120° or more). Alternatively, use multiple fixtures to cover the area. In plain terms, a single LED can light the same area as an old bulb, but you want to ensure the light distribution (spot vs flood) matches your needs. If you’re unsure, consult lighting layouts or ask Rytec Electric for guidance on spacing and aiming lights for even coverage.

When to DIY vs. When to Call a Licensed Electrician
Upgrading light bulbs is certainly a DIY-friendly task – anyone can change a bulb or plug in a smart lamp module. But how do you know when a project is over your head (literally)?
DIY-Friendly Upgrades: Swapping regular bulbs for LED bulbs, installing smart bulbs, and plugging in smart plugs or screw-in adapters are all safe and easy for homeowners. Even sticking LED tape lights under cabinets with adhesive or changing a lampshade is fair game. If you’re handy and cautious, you might replace simple fixtures like wall sconces or ceiling lights, as long as you turn off the power at the breaker and follow the installation instructions carefully. Many light fixtures come with clear wiring diagrams. Replacing a light switch with a like-for-like standard switch or dimmer can also be DIY if you have basic electrical knowledge – again, ensure power is off and use a voltage tester. There are plenty of tutorial videos on how to wire a single-pole switch or install a screw-in motion sensor in place of a bulb.
However, know your limits. Here are times to bring in a licensed electrician for your lighting upgrades:
Running New Wiring or Adding Fixtures:
If you want to add recessed lights where none exist, install landscape lighting tied into your electrical system, or put in new outlets or switches, that involves running cables, drilling through framing, and connecting to the mains – definitely a job for a pro. They will secure any necessary permits and make sure the work complies with local code (for instance, using proper gauge wire, staple and support rules, GFCI/AFCI protection where required, etc.). This keeps your home safe and insurable.
Electrical Panel or Circuit Changes:
If your lighting upgrade requires a new circuit (perhaps for a heavy landscape lighting load or adding a circuit for a home addition’s lights), you’ll need an electrician to install a new breaker and wiring. Also, if you suspect your current panel can’t handle additional load (maybe your breakers trip often), let a professional evaluate it. The good news is that LEDs draw so little power that adding many of them usually isn’t a strain on existing circuits – but still, any panel work is not DIY territory.
Smart Switch Install if Uncomfortable:
As mentioned, if you have an older home or a complicated 3-way circuit, an electrician can install a smart switch or dimmer in a snap, whereas it might take you hours of frustration. They’ll check that all connections are tight and the device is programmed correctly. It’s worth the small labor cost to avoid the headache (and potential sparks from miswiring).
High Ceilings or Difficult Access:
Changing a bulb in a standard 8-foot ceiling fixture is one thing; rewiring a ceiling fan 15 feet up in a vaulted ceiling is another. For your safety, if a ladder climb is risky or the fixture is heavy/challenging to support, have an electrician (often two, for big fixtures) handle it. They have the gear (tall ladders, even scaffolding) and experience to do it safely.
Flickering or Faulty Lights Persisting:
If you tried the basics (bulb swap, new dimmer) and lights still flicker, buzz, or behave oddly, there could be a deeper issue – like a loose neutral in your electrical system or an overloaded neutral with shared circuits, etc. An electrician can troubleshoot these issues using proper tools. Don’t ignore persistent flickering; it could be a symptom of a larger wiring problem that needs fixing to prevent hazards.
Code Compliance and Peace of Mind:
Certain installations have code requirements – for example, bathroom lights or receptacles near tubs/showers must be on GFCI circuits, closet lights have clearance rules from storage, outdoor lights need weatherproof boxes and covers, etc. A licensed electrician is well-versed in these rules (including the latest NEC and local amendments) and will ensure your new installations are safe and legal. This is especially important if you plan to sell your home in the future – you don’t want DIY electrical work causing issues on a home inspection.
In South Carolina, electricians are required to be licensed and insured. By hiring a licensed electrician, you not only get expert workmanship but also protect yourself – they will correct any dangerous wiring conditions they find and stand behind their work. At Rytec Electric, our team prides itself on doing it right the first time and making sure your home’s electrical system is safe and sound. We’re happy to handle the “hard stuff” so you can enjoy your new lighting worry-free.
So, if the idea of messing with wiring or spending hours in the attic running cable doesn’t appeal to you, give us a call. Even seemingly small tasks like installing an attic light or adding an outlet for under-cabinet lights can be quickly taken care of by a pro, saving you a weekend of frustration. Focus on picking out the fixtures and let the experts handle the technical parts.
FAQs: LED & Smart Lighting for Homeowners
Below are some common questions homeowners ask when considering LED upgrades and smart lighting. If you’re curious about something not covered here, feel free to reach out – we’re always happy to educate and assist!
Will switching to LED lighting really save me money?
Yes – a lot of money over time. LEDs are extremely energy-efficient, using up to 75-90% less electricity than incandescent bulbs for the same light output. For example, a traditional 60W bulb left on 5 hours a day costs around $13/year in electricity, whereas an equivalent LED might cost $2-$3/year. Multiply that by the number of bulbs in your home and you’ll see significant savings. Plus, LEDs last many years, so you’re buying fewer replacement bulbs. The DOE estimates that an average LED saves about $80 in electricity over its lifetime compared to an old bulb. So, although LEDs cost more upfront, they pay you back with lower bills and fewer purchases.
Can I use LED bulbs in my existing light fixtures?
In most cases, absolutely. LED replacement bulbs come in all the standard bases and shapes – A19 bulbs for lamps, BR30 for recessed cans, candelabra bases for chandeliers, T8 tubes for fluorescent fixtures, etc. You typically can just remove the old bulb and pop in an LED. One thing to check is the fixture’s maximum wattage rating. LED wattages are so low that it’s rarely an issue (a fixture rated for max 60W can handle a 9W LED no problem). But do make sure the bulb’s shape/size fits – some enclosed or small fixtures might not accommodate a larger LED bulb if it has a big heat-sink base. Also, if the fixture is on a dimmer or controlled by electronics (like some ceiling fan remotes), use a dimmable LED and a compatible control. A few specialty fixtures (like those with 3-way bulbs or very old low-voltage systems) might need special LED bulbs, but there’s usually an LED solution out there. When in doubt, ask an electrician or lighting store – but 99% of the time, yes, you can retrofit with LED bulbs directly.
Why do my LED lights sometimes flicker or buzz?
The most common reason is using LEDs with an old incompatible dimmer (or a non-dimmable LED on a dimmer). LED electronics respond differently than incandescent filaments. A fix is to replace the dimmer with an LED-friendly model. Cheap or off-brand LEDs can also flicker if their internal drivers are poor quality so, sticking to good brands (or those with the ENERGY STAR mark) helps. Buzzing can occur if a dimmer is chopping the voltage in a way the LED driver doesn’t like; again, a quality dimmer usually resolves this. If an LED flickers when appliances turn on, it could be minor voltage fluctuations – consider adding a surge protector or having an electrician check the neutral connections in that circuit. Finally, check that the bulb is screwed in tightly – a loose bulb can flicker (same as a loose fluorescent tube flickers). If you’ve tried all the above and still experience flicker, it’s time to consult a pro to diagnose the issue.
What’s better to install in my home, smart bulbs or smart switches?
This depends on your needs. Smart bulbs are great for flexibility (color changes, easy setup) and for lamps or fixtures where you want individual control. Smart switches are ideal for controlling multiple lights (like a set of recessed lights) or for keeping the wall switch functional for family and guests. Smart switches can be more cost-effective if you have many lights on one circuit – instead of 6 smart bulbs, one smart switch makes them all smart. However, installation is more involved (wiring in the switch). Many homeowners use a mix: for example, smart switches in main rooms and exterior lights, and a few smart bulbs for lamps or special areas. If you rent or don’t want to mess with wiring, smart bulbs offer a no-install solution. If you own and plan to stay a while, investing in smart switches (or a whole-home lighting system) can integrate more seamlessly. Also consider compatibility with your preferred ecosystem (Alexa, Google, etc.). We’re happy to advise on a case-by-case basis – or even install a combo of both to get the best of both worlds.
Do I need special wiring or Wi-Fi to use smart lighting?
For most smart lighting (bulbs, plugs, switches), you will need a decent Wi-Fi signal in your home. They typically connect to your 2.4 GHz Wi-Fi network. If your Wi-Fi is very limited, you might consider systems that use a hub (like Philips Hue with Zigbee), as those can be more reliable in larger homes without great Wi-Fi in every corner. As for wiring: no special wiring is needed for smart bulbs (they just use the normal lamp socket). Smart switches may require a neutral wire in the box, as mentioned above. If your home’s wiring is older and without neutrals at the switches, there are some smart switches designed to work without neutrals (using a capacitor or other method), or you might stick to smart bulbs instead in those locations. Generally, no new wiring is required unless you’re adding new fixtures. One more consideration: if you plan to have a lot of smart devices, a good router (or mesh network) is important. Many standard routers can handle 20-30 devices, but if you start having 50+ smart gadgets, upgrade your network equipment for stability.
Are there any rebates or incentives for upgrading to LED lighting or smart controls in South Carolina?
Homeowners have fewer lighting rebates nowadays than a few years ago (since basic LEDs have become standard). However, it’s worth checking with your electric utility. For example, Dominion Energy South Carolina has an online marketplace (EnergyWise program) that offers instant discounts on certain ENERGY STAR LED bulbs, smart thermostats, and other efficiency products. They sometimes run promotions where LED multipacks are discounted for residential customers. Also, federal programs and local initiatives occasionally provide rebates on smart energy-saving technologies. South Carolina has been rolling out energy efficiency incentives funded by recent federal bills – the HOMES rebate program may offer rebates for comprehensive home energy reductions, which could include lighting as a component if you significantly cut usage. These programs change over time, so the best advice is: check with your utility and state energy office for current offerings. And always purchase ENERGY STAR certified LED products when possible, as some rebates require it. Even without rebates, remember that the real payback is in energy savings, which, as we discussed, are substantial with LEDs.
How do I pick the right brightness LED when replacing my old bulbs?
Look at lumens. As a rule of thumb: if you liked a 60W incandescent, look for ~800 lumens in your LED. For a 75W bulb, ~1100 lumens. For a 100W bulb, ~1600 lumens. Many LED packages will actually list the incandescent equivalent to guide you. Consider the purpose: For reading lamps, you might want a bit brighter (800-1100 lumens). For decorative chandelier lights, lower lumens (300-500) might be fine. Also, take into account the shade or fixture – some light is always lost, so sometimes erring on the slightly higher lumen side with a dimmer installed for flexibility is a good strategy. The nice thing about LEDs is you can get high lumens without huge wattage, but you also don’t want to blind yourself. If replacing recessed lights, a common choice is a 65W BR30 flood – the LED equivalent is usually around 650-700 lumens. Most LED downlight retrofits will match the old brightness pretty well and often appear brighter because of the cleaner white light. When in doubt, we can help calculate and even demo different brightness levels for you during an upgrade consultation.
What’s the deal with beam angle and light spread? Do I need to worry about that for LED bulbs?
Beam angle matters mainly for directional bulbs and fixtures. Standard LED A-shaped bulbs (the kind that go in table lamps) usually emit light in nearly all directions (around 270° beam spread, with just the base not emitting). But LED spotlights (like MR16 or PAR bulbs, often used in track lighting or outdoor spots) have specified beam angles. For instance, a narrow spot might be 25° – giving a focused beam on a painting – while a flood might be 60° or 120° – covering a wider area. In general, room lighting with fixtures that diffuse light (like globes, pendants, lampshades), you don’t need to worry. But if you’re installing recessed downlights, look at their beam angle: a typical recessed LED might be around 100° which works for standard 8’ ceilings. Higher ceilings could benefit from a slightly narrower beam to punch down light (or just more fixtures). For outdoor floods, something around 120° will light up a broad area of your yard, whereas a 40° will illuminate a narrower zone (useful if you don’t want to disturb neighbors or want a directed security light). When replacing any specialty bulbs, match the beam angle if you liked the old bulb’s effect. If you want a different effect (say, highlighting art on the wall), choose a narrower beam for more spotlight effect. The packaging usually indicates if it’s a spot, narrow flood, flood, or wide flood. And many integrated LED fixtures will state how wide the light spreads. If all this is confusing, don’t worry – in most cases, standard medium-base LEDs for home use are omnidirectional enough that you’ll get good overall light. Beam angle is more of a consideration in designed lighting layouts or for accent lighting.
Ready to get started with your lighting upgrade?
Upgrading to LED and smart lighting is one of the best investments you can make in your home’s comfort, safety, and efficiency. From cozy warm lighting in your living spaces to cutting-edge smart controls that respond to your voice or phone, the technology available today can truly brighten your daily life (and lower your bills). Remember, you don’t have to do it all at once – you can start with a few bulbs or a single smart dimmer and build from there. Each little upgrade pays off immediately in energy savings and in the enjoyment you get from a well-lit home.
Rytec Electric is here to help. We offer professional lighting installation services for everything from LED recessed lights to smart switches and outdoor security lights. We’ll handle the hard work – you just sit back and enjoy the brilliant results! Contact us today to schedule a home lighting consultation. Call (803) 721-3734 to speak with our friendly team about lighting upgrades in Columbia, Lexington, Irmo, Chapin and surrounding areas. We’ll bring the bright ideas and expertise – you get to enjoy a brighter, safer, and more efficient home!
